
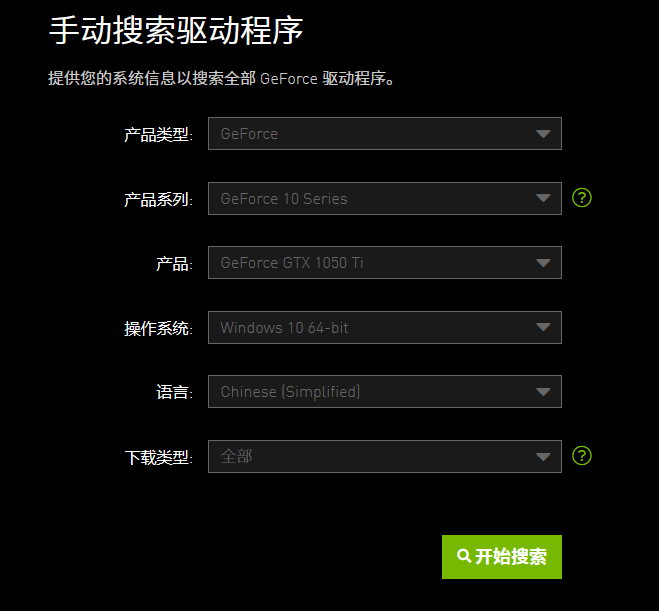
0. 安装 显卡驱动
根据显卡选择合适版本
https://www.nvidia.cn/geforce/drivers/

1. 安装 cuda
获取驱动支持的CUDA版本
# 驱动检查
nvidia-smi

# 得知最高支持的cuda版本  => CUDA Version

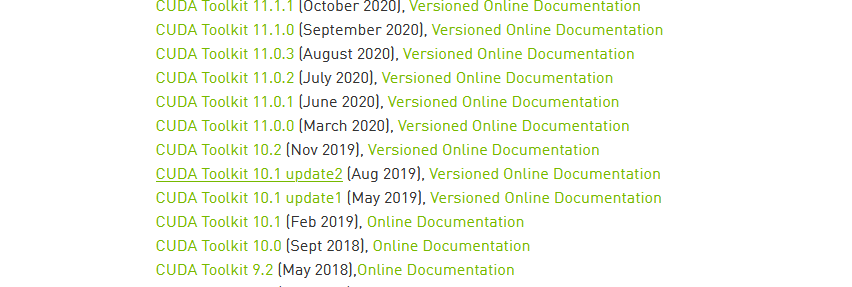
https://developer.nvidia.com/cuda-toolkit-archive
根据控制台 CUDA Version 下载对应版本
下图以10.1为例
2025.04.09 目前建议 py3.10 + cuda 12.4/11.8 主流
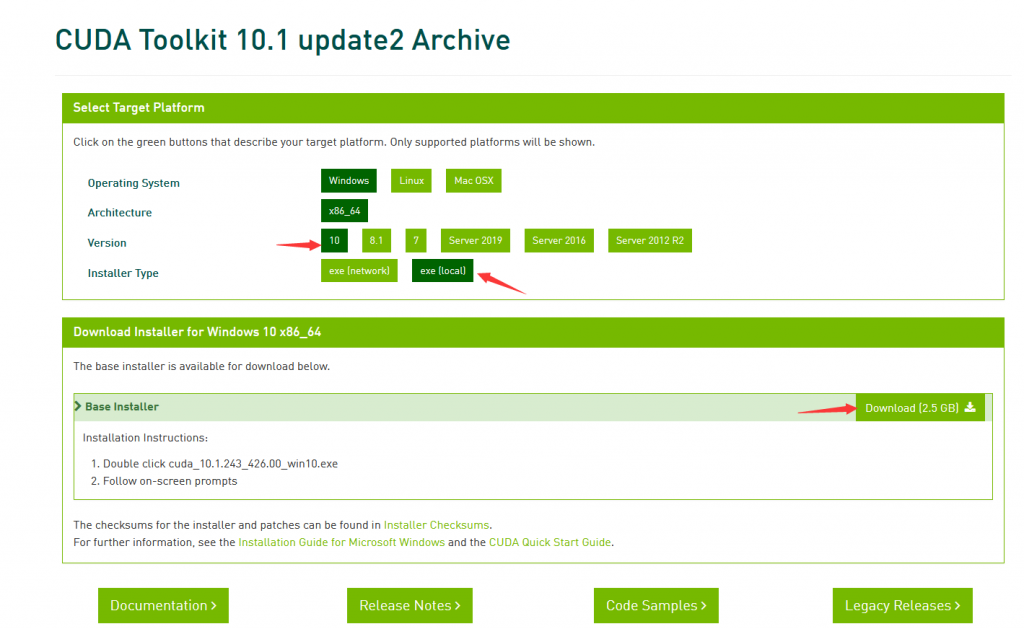
例: https://developer.download.nvidia.com/compute/cuda/10.1/Prod/local_installers/cuda_10.1.243_426.00_win10.exe
安装时可按下图选择精简安装,建议直接常规安装
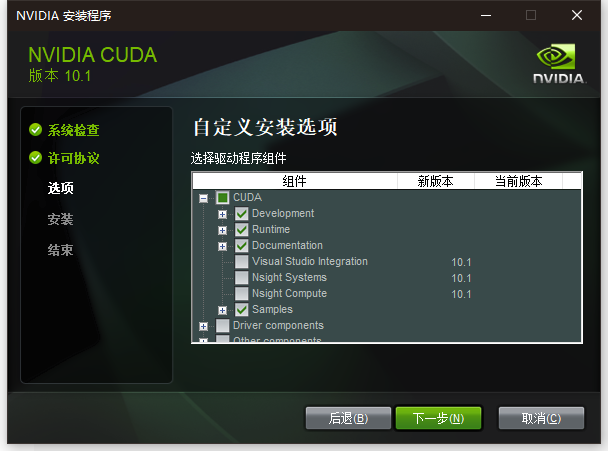
记得查看环境配置,没有得加( CUDA_PATH 按安装目录填写 )
| 环境变量名 | 环境变量值 |
|---|---|
| CUDA_BIN_PATH | %CUDA_PATH%\bin |
| CUDA_LIB_PATH | %CUDA_PATH%\lib\x64 |
| CUDA_PATH | C:\Program Files\NVIDIA GPU Computing Toolkit\CUDA\v10.1 |
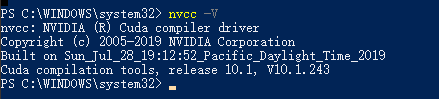
# cmd测试,此命令出错请检查环境变量
nvcc -V
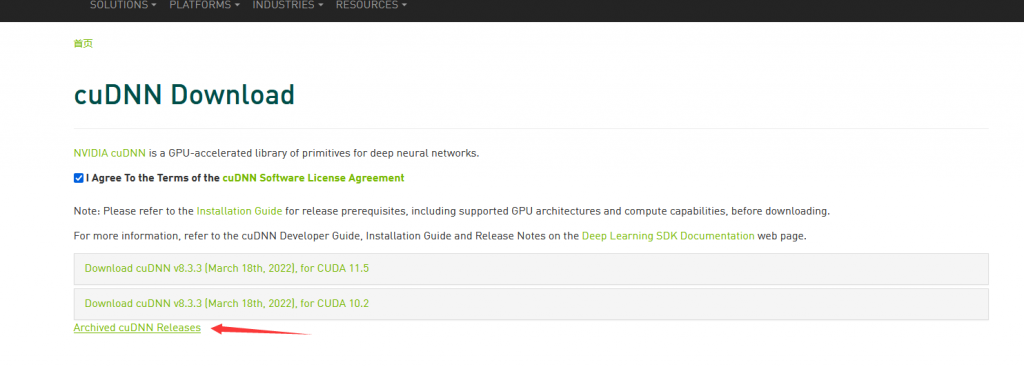
2. 安装 cudnn
需要登陆NVIDIA,请自备账号
cudnn
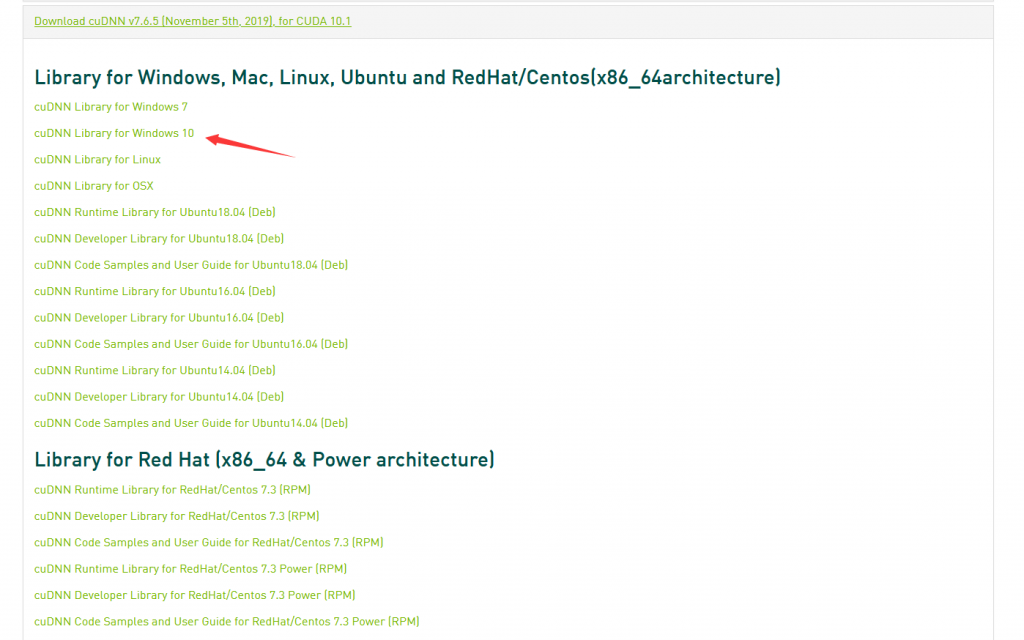
https://developer.nvidia.com/compute/machine-learning/cudnn/secure/7.6.5.32/Production/10.1_20191031/cudnn-10.1-windows10-x64-v7.6.5.32.zip
cudnn为嵌入式安装,即把解压后的 cudnn 文件夹移动至 cuda安装目录(合并目录)
C:\Program Files\NVIDIA GPU Computing Toolkit\CUDA\v10.1

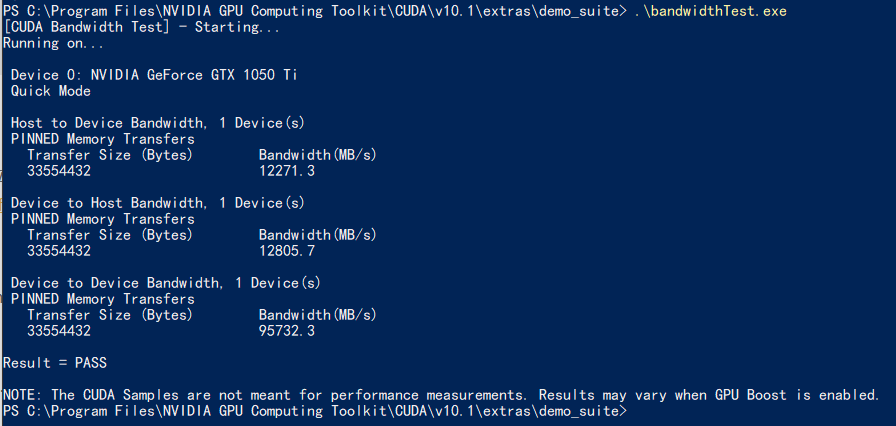
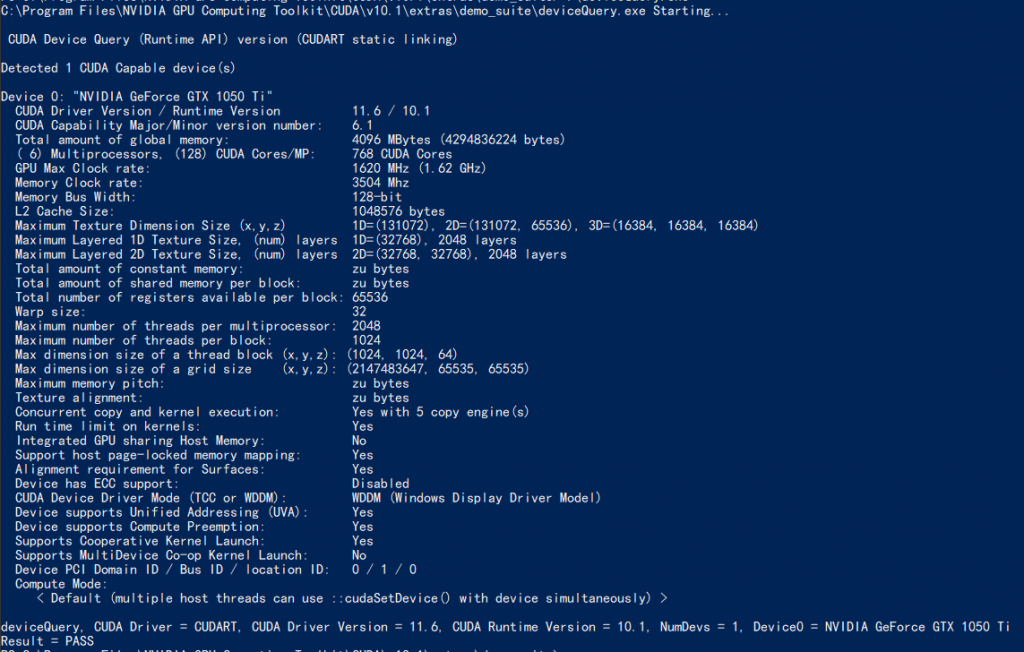
3. 校验安装结果
cd "C:\Program Files\NVIDIA GPU Computing Toolkit\CUDA\v10.1\extras\demo_suite"
# 测试1
.\bandwidthTest.exe
# 测试2
.\deviceQuery.exe

# 都看到 Result = PASS  就算安装成功
PS:
- cuda cudnn版本对应关系(可能要墙)
https://www.tensorflow.org/install/source#common_installation_problems
例如:
1050ti->cuda10.1->cudnn7.6
-
打不开建议改dns为8.8.8.8 或 上墙
附录
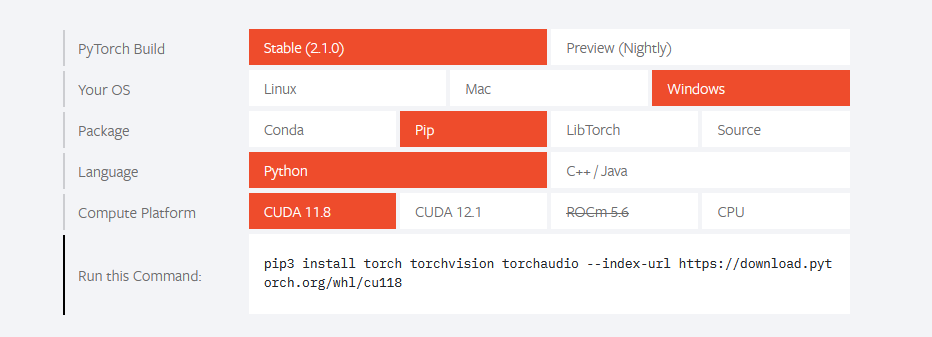
1. pytorch安装
https://pytorch.org/(可能需要墙)
从官网获取安装命令行(Run this Command)
# 使用清华镜像源会一直装cpu版本,不建议使用镜像源(网上的教程不要轻信)(特别是你的  print(torch.version)  显示的是 xxxx+cpu 的时候)
-i https://pypi.tuna.tsinghua.edu.cn/simple

# 可用pytorch源  暂时只支持到<=2.3.1
https://mirror.sjtu.edu.cn/docs/pytorch-wheels
https://mirror.sjtu.edu.cn/pytorch-wheels/torch_stable.html
https://developer.aliyun.com/mirror/pytorch-wheels/


# 替换 `https://download.pytorch.org/whl` 为 镜像地址
pip install torch torchvision torchaudio -f https://mirrors.aliyun.com/pytorch-wheels/cu118
pip install torch torchvision torchaudio -f https://mirror.sjtu.edu.cn/pytorch-wheels/cu118